.
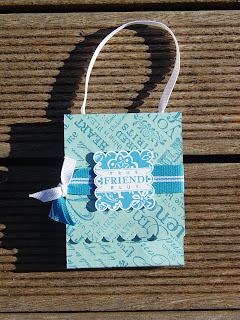
Just a short post today to tell you about a fabulous promotion that Stampin' Up! has running until 14 December 2009, where you can get a FREE punch (either the Scallop Square or Boho Blossoms) worth $35.95 for every $105 you spend on certain items from the IB&C (Idea Book and Catalogue). To download the complete list of items please click here.
Tomorrow I'll post a picture of a page I made with one of the items on the list, the I Wish Simply Scrappin' kit ($43.95). These Simply Scrappin' kits are awesome for making quick pages and cards, as they include a co-ordinating combination of cardstock, patterned paper and diecuts which goes together with little effort. I Wish has a Christmas theme, making it perfect for this time of the year, but as you will see tomorrow it doesn't necessarily have to be used on a Christmas page...
.
Wednesday, November 11, 2009
Tuesday, November 10, 2009
Sneaky Peak!
.
As promised, here is a sneaky peak of the door prize I've made for this weekend's event. Not the best picture I know, but that's what happens when you do photography at night (grrr!). Some lucky person will go home with this stationary kit on Sunday at the Tauranga Christmas Extravaganza - woohoo!! It has compartments inside that hold stamps, envelopes and greeting cards, as well as space for a notepad and calendar.
I got the template for this from the very talented Michelle Habib, who sells full instructions for making it on her website. I'm planning on making a few of these for Christmas presents, especially for some of my older relations. And if you're lucky I might just share the inside with you all sometime!
.
Sunday, November 8, 2009
So Young, So Innocent...
style.
It seems my scrapbooking ladies just can't get enough of Heritage scrapbooking, but in order to make this page more versatile I have leaned towards more of a 'modern' heritage style.
This is my Third form (Year 9??) photo taken in 1986 when I was in my first year at boarding school. I can't believe how young and innocent (naive??)I look in this photo!
In order to give the page a timeless feel I have used the gorgeous Parisian Breeze DSP ($27.95), which is only available until the end of this month (sob!) when the Spring Mini catalogue ends. This DSP is a textured coverweight, so is perfect for those mini albums. I'm really going to miss it when it's gone... (can you tell!?!). I've also coupled this paper with the beautiful Great Friend set (also leaving in the Spring Mini!), which at $37.95 for five co-ordinating stamps is great value. In order to make the customised border shown below I used Baja Breeze ink to stamp the En Francais ($39.95) background onto glossy cardstock and then stamped the butterfly from Great Friend in Versamark before embossing it with white embossing powder (some students used clear embossing powder too so that the En Francais words showed though), and lastly sponging over the top with Baja Breeze again. I love how it all co-ordinates and really showcases this (modern) heritage page!
To add some extra special touches I have used a crystal brad, white half pearl and flower from the Pretties kit ($66.95 for TONS of bling!). The flower has been dyed with the Baja Breeze reinker to co-ordinate with the rest of the page. A few butterflies fluttering through the bottom left-hand corner symbolize my journey from innocence to... well, all that I am today!
Check out my blog tomorrow for a sneak peak of the door prize I am making for the Tauranga Extravaganza that is on this coming Sunday at St Johns Church in Bureta. I still have a couple of spaces left to fill so please contact me ASAP if you would like to join us for a fun afternoon of stamping and crafting on Sunday afternoon!
Labels:
Designer Series Paper,
Scrapbooking
Monday, October 19, 2009
Cute Punch Art
.
I love cute punch art, and this owl and lamb are the cutest I've found yet! I can't take the credit for designing either of these though, as I found them both on my travels in cyberspace, but I have designed the cards that they sit on.
One reason I love punch art is because it extends the usefulness of my punches, and allows me to create unique embellishments for my cards and scrapbooking pages. Stampin' Up! currently sell 36 different punches and both of these cards only use 12 of them! Although I have been in love with Stampin' Up! for over a year now I have yet to complete my punch collection - but I'm more than half way there! How many punches do YOU own??
Owl Recipe:
Ink: Old Olive, Chocolate Chip
Paper: Old Olive, Pumpkin Pie, Close To Cocoa, Chocolate Chip, Very Vanilla
Punches: Wide Oval, Scallop Circle, 5 Petal, 1" Circle, 3/4" Circle, 1/2" Circle, Round Tab, Boho Blossoms, Designer Tag
Stamps: Seeing Spots, Short & Sweet
Other: Vintage brads, cork, goggly eyes, Dimensionals
Lamb (cased from here) Recipe:
Paper: Almost Amethyst, Whisper White, Chocolate Chip, Pink Pirouette, Creamy Caramel
Punches: Scallop Circle, Wide Oval, Scallop Edge, Boho Blossoms, Word Window
Other: Basic Black marker, White Gel Pen
Tuesday, October 13, 2009
Get ready for Christmas!
.
Christmas is just around the corner, and this year's Christmas is going to be EXTRA special because I will be spending it with my nephews and niece in Australia!!! Yes, I'm leaving on the 17th of December for Sydney! I'm really looking forward to having a Christmas with kids (because, after all, isn't that what Christmas is all about!). I'm a little bit worried about the heat (!!) but am starting to get even more worried about just how much I have to do between now and then; cards, presents, decorations - it's enough to make my head spin!!
Luckily I found some gorgeous easy to make ornaments on Gretchen Barron's blog, so I've got the tree sorted! I also made some of these ornaments for our Creative Inkers team swap on Saturday, which happily also had a Christmas theme, and put them on a little Christmas tree so that the other ladies could each pick one and leave behind a swap for me under the tree.
These gorgeous little origami ornaments are made using the lovely Ski Slope DSP paper ($19.95 for 12 sheets) from the Spring Mini Catalogue, which is only available for another 6 weeks. The advantage of using double-sided paper is that it is slightly thicker than regular paper and makes a sturdier ornament.
If you would like to find out how to make this then sign up for my FREE newsletter here. During the run up to Christmas I will be sending out regular Christmas bonus newsletters showing you a variety of quick and easy Christmas projects that even the busiest person will have time to do. And hopefully I will be able to fit some of them into my suitcase to take to Oz for my nephews and niece!
.
Labels:
3D Items,
Christmas,
Designer Series Paper,
Swaps
Wednesday, September 30, 2009
Converting Cardmakers to Scrapbookers??
.
Hooray, I've managed ONE blog post in September!! Sorry I have been such a slack blogger - as usual, life happened!
This month the Creative Inkers Team Challenge was to create a scrapbooking layout or project that would appeal to scrapbookers using Stampin' Up! products. One aim of this was to maybe convert some of our cardmaking customers into scrapbookers. Personally, I have had no problems converting the cardmakers to scrapbooking, but converting scrapbookers to cardmaking is another story! For that reason I created the following page which I cased (an anagram for "Copy And Share Everything") from the Spring Mini Catalogue (page 17) using the wonderfully masculine set Uncharted Territory ($40.95).
To get the effect shown on the card I was casing I firstly stamped the images onto acetate using StazOn Cotton White ink, then stamped the highlighted areas onto colored cardstock before cutting them out and adhering to the back of the acetate. I used a torn piece of Pacific Point cardstock to make the ocean and there you have it - a scrapbook page cased from a card!
I also used the stamp set Enjoy Every Moment ($62.95) to create the title and journalling block, and the background card is the very funky Ballet Blue - not a very masculine name but a very masculine colour!
I am holding a scrapbooking class this Sunday, 4th October, so please contact me to book in if you would like to become a scrapbooking convert!
Labels:
Challenges,
Scrapbooking
Sunday, August 23, 2009
When the cat's away....
.
The mice make cards!! The last 'Cat's Away Challenge' was to make cards for the three lovely ladies who have been away in Noosa, and what better than some cat cards! You may recognise one of the cards - it was my entry for the Corrosive Challenge #25. These are the three cards I made for Jacque, Patrice and Rachael:
All materials are from Stampin' Up! except for the Penny Black cat stamp. The greeting and background stamped on the Kiwi Kiss card here are from the set Cheers To You, which goes perfectly with the cat sipping a mocktail.
In the next two cards I changed around the layout and colouring, using my aqua brush to get a cool (and easy!) watercolour effect from my ink pads.
I haven't decided who is getting which card yet, but I sure hope Jacque, Patrice and Rachael enjoy them and that they bring back fond memories of their time in the sun!
Labels:
Cards,
Challenges
Corrosive Challenge #25
.
A very hurried post as I am late for my scrapbooking class! This card is part of two challenges; one for our demonstrator forum and the other for the Corrosive Challenge #25. Gotta love those cats ay!! More later, gotta run!!
Labels:
Cards,
Challenges
Wednesday, August 19, 2009
Very Popular Workshop Card
.
My lovely upline Jacque and two other members of the Creative INKers team earned an all-expenses paid trip to Noosa through their hard work demonstrating Stampin' Up! products last year, and while they are away the rest of the team is keeping busy with challenges to do in their absence. Our first challenge is to blog a popular project from one of our workshops, and this one immediately sprung to mind!
This card was a very popular one at the two workshops I demonstrated it at. It features the classical set Baroque Motifs ($46.95), a stunning set for use in both scrapbooking and cardmaking.
This card was shamelessly CASED off Splitcoast Stampers, the fountain of a lot of my inspiration for the projects I make. Here is a pic of the card partially opened - I just love gatefold cards!
This card has inspired many of my customers to buy the Baroque Motifs set, and also the Chocolate Chip cardstock ($12.50 for 24 A4 sheets). Actually, Chocolate Chip is my favorite cardstock, as it goes with any other colour; it's practically neutral! The other colours used are Almost Amethyst and Very Vanilla, and I used the slit punch to create the closure for the gatefold bar. I even managed to type out some instructions for this project, so if you want a copy then please feel free to email me!
Labels:
Cards,
Challenges
Tuesday, August 4, 2009
Pretty.... easy!
.
This is another card I made for the Spring Mini catalogue launch I held at my home on the weekend. Because of my supreme organisation and time management skills (NOT!!) I had to make most of my samples in a hurry at the last minute (obviously being in the Brownies and Guides with their motto 'Be Prepared' didn't rub off on me!). Luckily the stamps in the Spring Mini make it really easy for people like me to whip up a card in a hurry, which is exactly what I did!
This card uses two of the new sets; Soft Summer ($48.95) and Great Friend ($37.95). Soft Summer is a two-step stampin' set, which means you can stamp the outline and the body of the image separately (i.e. in two different colours). This is what I have done on the flower, with the image stamped in black Stazon and the body stamped in Pink Pirouette. I had originally intended to brayer or sponge the flower, which is why I used Stazon and gloss card, but the gloss gives a nice effect even if it is 'naked'! I used the body of another image from the same set to make a subtle background on the Almost Amethyst cardstock, by stamping on it with the same colour ink.
The sentiment and border from the Great Friend set is actually two stamps as well, and because the sentiment fits so tightly in the frame I needed to use a Stamp-a-ma-jig to get the positioning correct. Don't know what a Stamp-a-ma-jig is or what to use it for? Email me to find out! I then carefully cut this out and attached it to a strip of Pink Pirouette card and finished off with a flower brad (also available in the Spring Mini for $16.25 for a pack of 32). And there you have it, simple but easy peasy!!
Labels:
Cards,
Stamp-a-ma-jig
Monday, August 3, 2009
Scary or Traditional? You Decide!
.
This fellow has caused quite a bit of debate among the other demonstrators in the team I belong to, with some saying he is scary and others liking him for the traditional feel he brings. What do you think? I was in two minds, but bought the set anyway (gotta get those Christmas cards sent early this year!) and now he's grown on me. I certainly don't think he's scary!
This was a really simple card to make, yet so effective. For the front I used Very Vanilla cardstock on Riding Hood Red, and used the matching ribbon to create a bit of elegance as well as tie the whole Christmasy theme together. The ribbon is newly available from the Spring Mini catalogue for $22.95 for a whooping 9 metre roll. To 'pop' the greeting up I covered it with Crystal Effects dimensional lacquer ($13.95), which gives a page pebble effect.
Inside the card I have used Very Vanilla for the inner panel, and have stamped the holly and greeting using Old Olive and Riding Hood Red ink. This set (Good Cheer - $46.95) is great value as you get a phrase for your card inner as well as the images.
Stay tuned for more peeks of what I've made from the new Spring Mini (have you got yours yet??).
Sunday, August 2, 2009
It's a new month, and a new day, and a new catalogue
.
Oh dear, I've been a bad blogger! But it's a new month and I intend to change my ways, and what better inspiration than the new Spring Mini catalogue from Stampin' Up! I had a great launch party yesterday - wow, haven't had that many people in the house in years! I made some samples using the new sets, and my favorite one is this very masculine card:
The stamp is from the set Uncharted Territory ($40.95), which also includes a very cool lighthouse stamp. I've used the new Parisian Breeze Specialty DSP ($27.95), a textured cover-weight paper in delicious shades of Baja Breeze and Chocolate Chip, in this very simple but effective design. The yacht and sentiment are stamped onto white gloss card with black Stazon ink, and then sponged with Baja Breeze and Pacific Point inks, which are then polished off to give a soft look. The strip of Baja Breeze is attached to the layout with clear rhinestone brads and dimensionals to give additional depth. This design would be great for a scrapbooking layout too. I got it from a blog called Cat's Scratching Post.
Please contact me if you would like a copy of the new Spring Mini catalogue - it's packed full of great ideas and inspiration, and best of all it's free!
Labels:
Cards,
Designer Series Paper,
Masculine
Sunday, June 14, 2009
Pun Fun Waterfall Card
.
It's been another busy day today, with one workshop done and dusted! We made the following items at the Cards and More workshop today:
This is a classic waterfall card; when the tab is pulled down the three images flip over to reveal each other. I have used the animals from the new Pun Fun set - really easy as I mounted the accompanying words separately on the end of each block. The sentiments are stamped using the very versatile set Short & Sweet - a great set to use with the circle, oval and label punches!
All going well with the weather I will photograph this month's projects and post them here soon. If you would like to know how to make any of the projects shown on my blog please contact me, and I'll gladly send you instructions or links to resources I have used. Thanks for looking!
Waterfall card Recipe:
Cardstock: Pink Pirouette, Whisper White
Ink: Going Gray, Baja Breeze, Pink Pirouette
Stamps: Pun Fun, Short & Sweet, Cupcakes
Accessories: Silver brads, Pink Pirouette striped grosgrain ribbon
It's been another busy day today, with one workshop done and dusted! We made the following items at the Cards and More workshop today:
- A flower pot card
- An origami box
- A cute baby card featuring a punch art lamb
- A card using the the gorgeous Friends 24-7 set, heat and stick powder and Aqua Super Nova glitter
- A tri-shutter card using the Haiku designer series paper.
This is a classic waterfall card; when the tab is pulled down the three images flip over to reveal each other. I have used the animals from the new Pun Fun set - really easy as I mounted the accompanying words separately on the end of each block. The sentiments are stamped using the very versatile set Short & Sweet - a great set to use with the circle, oval and label punches!
All going well with the weather I will photograph this month's projects and post them here soon. If you would like to know how to make any of the projects shown on my blog please contact me, and I'll gladly send you instructions or links to resources I have used. Thanks for looking!
Waterfall card Recipe:
Cardstock: Pink Pirouette, Whisper White
Ink: Going Gray, Baja Breeze, Pink Pirouette
Stamps: Pun Fun, Short & Sweet, Cupcakes
Accessories: Silver brads, Pink Pirouette striped grosgrain ribbon
Thursday, June 11, 2009
Cheers To You!
.
I love the new In Colors, and the ease with which they go together! I created this really quick and easy card in next-to-no-time using ONLY the In Colors (plus a little bit of Whisper White!):
The main color in this card is Kiwi Kiss, a colour I wasn't too sure about at first but now love. I gave the card a retro feel using the 1/2" circle punch to create a border of Kiwi Kiss and Pacific Point (a real 'ooh-la-la' combo), and finished it off with a dab of Dazzling Diamonds in the middle of each punchie. The greeting is punched out using the Designer Label punch, with a bordering 1 3/8" circle punchie. The Pacific Point striped grosgrain ribbon just finishes this card off nicely! It also occured to me after I made it that it could pass as a 'male-friendly' card, especially if I had used the handle of beer image from the Cheers set!
If you don't have these colours yet then what are you waiting for?? Contact me NOW to order the matching card and ink pads. For those of you who bought the latest Stampin' Up! catalogue from me, the voucher for this month allows you to buy four ink pads and receive a fifth blue one for free! But if you didn't get a voucher book don't worry, you won't miss out. For this month only you can take advantage of the same offer if you email me and mention that you saw this offer on my blog! So... what are you waiting for??
Tuesday, June 9, 2009
Another Swap!
.
I love this Top Note die! It is made exclusively for Stampin' Up! by Sizzix, but sadly is not yet available in NZ. However, I live in hope that it will be coming to NZ soon - maybe in one of the mini catalogues that are due out on 1st August, 1st December and 1st April (2010). I can dream!!
The theme of this swap was 'Your favourite card layout', and at the moment this is my favourite! I'm pretty fickle though, so my favourites change quite regularly!! I have used the stamp set Spring Song for this card. As soon as I saw it in the catalogue I fell in love with it and knew I had to have it! All three stamps from the set are used in this card - they just go so well together. The set costs $30.95 so is great value for money! LOL - but can you tell I have never seen a hummingbird before in my life?? I chose to use only the current In Colors on this card, so please forgive me if the bird is not colored in correctly!
Here is the recipe:
Inks: Pacific Point, Riding Hood Red, Pink Pirouette, Baja Breeze, Kiwi Kiss, Tangerine Tango
Papers: Whisper White, Pacific Point
Stamps: Spring Song
Accessories: Eyelet Border punch, Top Note die (USA only), blender pens, sponge, Dazzling Diamonds glitter (to give it some BLING!)
Saturday, June 6, 2009
My Team Swap
-
Whew! I've had one busy day! I taught a beginner's scrapbooking class at Kamo High School with six lovely ladies who hadn't scrapbooked before, and they did really well!! We made two and a half pages (one was the hinged page I talked about in an earlier post - with my god daughter in the Santa Parade - hence the 'half' page) and they got to take away enough materials to make a third page. It really took me back to the time when I first started scrapbooking, and I ended up digging out photos of the first albums I made for my nephews - scary stuff!!!
Anyway, so while I was busy working away other members of the Creative Inkers team (the Stampin' Up! team that I belong to) were busy attending a team training day in Auckland. I'm sorry I missed catching up with those of you who were there today, but I'm sure there will be other times. Here is a photo of my swap that I sent down for my team mates - I made 30 of these little purses in no time at all, so very fitting for the theme of the swap: "A Simple Workshop Demonstration Item".
And the purse opens to reveal a surprise... Kit Kat!! I'm not too sure how many purses will still be full by the end of the day though {wink, wink}. All I know is that they were lucky to get them as my auntie has taken a liking to Kit Kats since I started making these (she previously claimed not to like chocolate!).
If you would like the instructions for making this cute purse please email me at rmkaire@xnet.co.nz. Have a great weekend and keep warm wherever you are!
Monday, June 1, 2009
Raspberry Tart Double-Page Spread
.
Well, you might need to click on this photo to see the pages in their full glory, as I cropped it before uploading - it's so hard to take a shot of two 12x12 pages side by side!! This DSP is so girly, and perfect for some shots of my lovely niece Moana as she turned the big ONE! The photos aren't the best, but they just go perfectly with this paper. It's also not my usual style to make two pages symmetrical with each other, but it worked really well in this case.
Here's the recipe:
Papers: Whisper White, Rose Red, Kiwi Kiss, Raspberry Tart DSP
Inks: Rose Red
Stamps: So Swirly Jumbo Wheel
Accessories: Eyelet Border punch, 5 Petal punch, Boho Blossoms punch, Ticket Corner punch (USA only), Top Note Sizzix die (USA only), Silver Hodgepodge Hardware, White Gel Pen.
Labels:
Designer Series Paper,
Scrapbooking
Friday, May 29, 2009
My latest Heritage Page
.
This is the page we made at May's scrapbooking workshop held at Christine's lovely home. I wish now that I'd taken a photo of the view from her deck, but alas I didn't!!
This page was inspired by the Monthly Challenge on my upline Jacque's blog (click here to view the other entries). It is a page by Becky at PageMaps.com - great for inspiration if you are ever stuck for ideas! Although I haven't stuck religiously to the sketch it retains the main elements. And I love the title, made with my favourite Heritage alphabet, Lovely Letters.
This page was a bit like a jigsaw puzzle to make, as all the paper pieces had to be placed in the exact order to get the overall effect. The blank panel in the middle is for the journalling, which I am yet to do!! This page used the following items:
Paper: Very Vanilla, Not Quite Navy, Close to Cocoa, Bella Bleu DSP
Inks: Not Quite Navy, Close to Cocoa
Stamps: Lovely Letters, Echoes of Kindness
Accessories: Spiral punch, Photo Corners punch, Piercing Mat, White Gel Pen, Scallop Edge punch, Eyelet Border punch.
Labels:
Challenges,
Scrapbooking
Tuesday, May 19, 2009
Always...
.
Okay, I have a lot of 'old' stuff to post before I can get onto my 'new' workshop stuff. This is a really simple little notecard I made with the timeless Always set. The circle stamp is easily punched out with the 1 1/4" circle punch and is attached to the note with a dimensional. The only non-SU! thing here is the brads - I'm not sure what brand they are but they're really cute heart-shaped ones! Hmm... I might make this card for my simple swap!
Thursday, May 7, 2009
A Real Challenge
.
This page was made for the Scrapbooking Shed Cooper's Beach Camp challenge. They hold two camps a year, one in Autumn and one in Spring, and each time they have a challenge pack consisting of different materials that you must use to make a page with. Although you can use your own stamps, inks, punches etc, you are not allowed to use any other materials! AND... you have to use at least some of every different item in the pack!
It was really interesting to see what everyone else made with their packs - they were so different! I am thinking of hosting a challenge of my own, using only Stampin' Up! materials just to see what everyone else makes. Packs will be no more than $5 - let me know if you want to join in!
The Stampin' Up! products used in this page were the Always set, Round Tab punch, Photo Corner punch, 1 1/4" Circle punch, 1/2" Circle punch, Chocolate Chip ink, Piercing Mat and white gel pen. Btw, the two stamped panels open up using the Round Tab hinges to reveal hidden journaling inside!
Labels:
Challenges,
Scrapbooking
Wednesday, May 6, 2009
My Version of the "Scallop Bite" Card
.
This card has been CASED off a blog by a US Demo whose name escapes me at this moment! It's such a versatile card to use, and so easy to make! I made swaps for our Stampin' Up! team based on this idea.
Although the colours in this card, as well as the greeting set, are now retired it is such a timeless design that I will be using this for many years to come! And it would look great with the new DSP (Double-sided designer paper) that is on special this month.
Here is the recipe:
Stamps: Circle of Friendship (retired), So Swirly wheel, Short & Sweet
Inks: Groovy Guava (retired), Chocolate Chip
Papers: Groovy Guava (retired), Chocolate Chip, Very Vanilla, Afternoon Tea DSP (retired)
Accessories: Scallop Circle punch, 1 3/8" Circle punch, 1 1/4" Circle punch, 1" Circle punch, 1/2" Circle punch, Groovy Guava double-stitched ribbon (retired), Wild Wasabi double-stitched ribbon (retired)
Tuesday, May 5, 2009
Another Heritage Page
.
I designed this page for my first scrapbooking workshop held on 21st March. I really wanted to do a heritage page (I have so many old photos that I've rescued from the dreaded magnetic photo albums!) as some of the ladies who were coming are really into heritage albums. So this is the result:
The DSP is now retired, as is the aged copper HodgePodge, but all the other elements used are still available.
Here is the recipe:
Stamps: Lovely Letters alphabet, En Francais, Baroque Motifs, Wonderful Favourites
Ink: Close to Cocoa, Chocolate Chip
Papers: Creamy Caramel, Very Vanilla, Chocolate Chip, Close to Cocoa DSP (retired)
Accessories: Round Tab punch, Word Window punch, 1/2" circle punch, Scallop Border punch, Piercing mat, white gel pen, Very Vanilla taffeta ribbon, Aged Copper HodgePodge (retired)
Monday, May 4, 2009
Jacque's April Challenge
.
Another cool sketch from Becky at pagemaps...
...and the finished page.
Geez, it's been a while! I've been wanting to get on here and post for soooo long, but just never got round to it (need one of those for Christmas - hint, hint!!). AND... I'm late to post this for Jacque's latest challenge, but I did make it in April I promise! Check out the other great entries on her blog here by clicking on 'Monthly Challenge' (I don't think they're archived so you've gotta be quick!).
I've got so many more photos to post, so my challenge is to post EVERY DAY until all my photos are up!
Sunday, March 1, 2009
Kristina Werner Colour Challenge #43
.
Wow - lotsa colors this week! I decided to do a page this time instead of a card. It's for my friend's son Nick, who made me a beautiful bone carving (I was quite moved when he gave it to ME!). This is his cat Rosie, who is so cute, cuddly and friendly. I love black and white cats!!! To check out the other great entries visit Kristina's blog.
Recipe:
Stamps: So Swirly Wheel, Short & Sweet, Big Deal Alphabet.
Paper: Brocade Blue, Ruby Red, Old Olive, Pumpkin Pie and Chocolate Chip cardstock, Old Olive DSP
Ink: Chocolate Chip, Ruby Red, Old Olive
Accessories: 1 3/8" circle punch, designer label punch, round tab punch, slit punch, aged copper brads and spiral (from aged copper Hodgepodge set).
Tuesday, February 24, 2009
Kristina Werner Colour Challenge #42
.
I'm a bit late posting my entry for Kristina's color challenge #42 this week. I had an idea of what I wanted to do, but had to fiddle around with the layout etc. Looking at it now I should have stamped a person in the truck - maybe next time! I, like others, have substituted Old Olive for Kiwi Kiss, as we are about a month away from getting that. I also substituted Ruby Red for Really Rust, as I had cardstock in that colour.
For some reason I love stamps with pumpkins in them!?! Maybe it's because Autumn is my second favourite season (after Spring). I'm really looking forward to Autumn this year - hopefully the horrible mugginess will go away, then I can think about moaning about being cold (yay!). Until then, the airconditioner is my best friend ;~)
Here is the recipe for my card:
Stamps: Loads of Love, Loads of Love Accessories
Inks: Ruby Red, Basic Black, Old Olive, More Mustard
Papers: Whisper White, Ruby Red, Old Olive, More Mustard
Accessories: Scallop circle punch (clouds), 1" circle punch, small tag punch, large tag punch, brads and tag hanger from the aged copper Hodgepodge Hardware set
Wednesday, February 18, 2009
Stamp Happy Challenge of the Month - February 2009
I have been doing a few challenges lately, and this is one from Jacque's blog. She got this sketch from Becky at Pagemaps. If you're ever stuck for inspiration for scrapbooking layouts then this is the site to visit!
Using the sketch as my inspiration I made the following page about me and my baby, Lil' Missy. I didn't have three small portrait photos of her so I modified the sketch so that I could use the photos I had. It looks kinda collage-y which also captures her personality. She's a real witch, but I love her anyway!
Here is the recipe:
Stamps: Warm Words
Inks: Pretty In Pink, Wild Wasabi, Pixie Pink
Papers: Afternoon Tea DSP, Wild Wasabi, Whisper White
Accessories: Aluminium-edged circle tag, cat punch, silver foil tape, white gel pen, Bella lettering, Making Memories rub-on letters, Bradletz flower brads, Groovy Guava double-stitched ribbon
Labels:
Challenges,
Scrapbooking
Monday, February 16, 2009
Scrapbooking Shed Christmas Page Challenge
This weekend the Scrapbooking Shed in Kerikeri had a scrap weekend for Valentine's day. I went up for it and caught up with some old friends from the Cooper's Beach camps, as well as made some new friends (hi Alison and Nola!). It was a really great day - great company, great nibbles and some really cool pages being made. Rowena and Carolyn (the owners) made it a great day, and if any of you are going through Kerikeri stop in at the Shed - 175 Pungaere Road, just out of Waipapa.
Anyway, they also held a scrap challenge, which was to make a 12"x12" scrapbooking page with a Christmas theme. And guess what? I won!!! The page I made was of my gorgeous god-daughter Carla, who at seven was finally allowed to be in the Auckland Santa Parade (her father has been in it for the past eight years as a certain bearded man in a red suit!). She got to dress up as a 'Sugar Plum Fairy' and she looked too cute!!! Of course I took waaay too many photos, so devised the following layout with some hidden areas so that I could fit them all in!
Firstly, here is the page as it initially appears...
...Then the left side opens (love that round tab punch!) to reveal more photos.
But wait - there's more! The right side photo opens out to reveal another photo and some journalling about the day.
And here is the layout fully opened out:
I wanted to make it like a fairytale book, where the outside is the cover and the inside is where more information can be found. It's also a good way of displaying the best photos on the layout, but keeping the other 'less good' photos that you don't want to discard or not memorialise in a scrapbook. I found that using the round tab punch and star brads from the silver Hodgepodge set to make the 'hinges' kept with the theme of an old bound book. Hope you like it!
Here is the recipe:
Stamps: One of a Kind (Spring 2008 mini), Big Deal Alphabet, Short & Sweet
Ink: Purely Pomegranate, Pretty In Pink
Paper: Purely Pomegranate, Old Olive, Chocolate chip, Very Vanilla, Pretty In Pink
Accessories: Round tab punch, 1/2" circle punch, designer tag punch, boho blossoms punch (Spring 2008 mini), silver Hodgepodge brads and frame, piercing tool, Very Vanilla 5/8" grosgrain ribbon, Basic Black marker pen
Labels:
Christmas,
Scrapbooking
Sunday, February 8, 2009
Kristina Werner Colour Challenge #40
.
Wow, this is my first Kristina Werner Colour Inspiration Challenge and it wasn't an easy one, considering the only ink in this colour I own is Old Olive!! I came up with this card by spreading the cardstock out on the table and looking at the colour combinations. Then it hit me - Wanted! I love this set, even though there's no wild west or cowboys in my neck of the woods. It's so versatile - I have used it on scrapbooking pages, altered containers and now on a card (duh!!).
So here it is:
I used Dimensionals under both the scallop circle and 3/4" circle to give the embellishments a bit of a lift, as well as some of those funky brads from the silver Hodgepodge set:
Here is the recipe:
Stamp sets: Wanted and Short & Sweet
Ink: Old Olive and Tempting Turquoise (lighter version of Taken With Teal, which I don't have yet...)
Cardstock: So Saffron, Old Olive, More Mustard, Whisper White
Accessories: Silver Hodgepodge brads and frame, paper piercing mat and tool, Dimensionals, scallop circle punch, 3/4" circle punch
Right I'm off to the beach now. Hope you all had a great Waitangi weekend (NZers) or just a great weekend (rest of the world)!
Subscribe to:
Posts (Atom)